Thursday, April 10, 2014

Spatula Painting

I've been having fun with my advanced students teaching them how to paint with a palette knife. Then this past weekend at the State VASE contest, I had an opportunity to teach 80 of the best art students in the state how to paint with a kitchen spatula!! It was a blast.

Here are a couple of the samples I made.


Here is my tutorial!

How to make an acrylic painting with a spatula by emilymclemore

Friday, March 7, 2014

Art 2 Self Portraits


As we get to spring break, I'm trying to clean up my room, my files and get students to finish up artwork!

Part of this clean up is updating my website, my artsonia site and just general publicity stuff for the kids.

Animoto gives me a chance to make 30 second videos for free, so here are some of the self portraits that students have completed recently.

[Click on Art 2 Self Portraits to see the video..]

I can only include like 12 pictures in the video, so these videos are just representative works. It hard, I'd like to include everyone's work, but I don't want to pay for the animoto membership!! :)

If you want to see more of the work, make sure to check out my artsonia site!

Monday, March 3, 2014

Art 1 Still Life Painting Projects

Art 1 students have been drawing and painting a still life for what seems like weeks! The process has been rather involved, but well worth the efforts. 

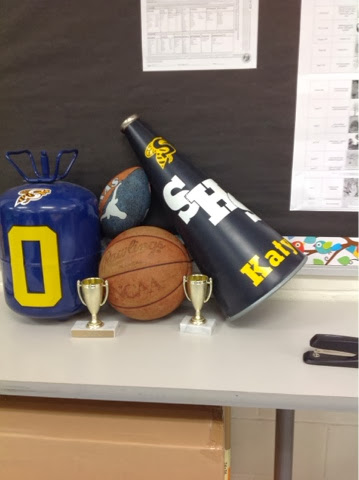
Here are a couple of pictures of the still life set ups. I placed 9 arrangements of different objects around the classroom. Thankfully I have a large room!


Students were required to draw each of the 9 arrangements 3 times on a quarter size piece of paper. Yes, that was 27 drawings!!! As you can imagine, they appreciated this assignment.

Once the 27 were done, the students then chose one they enjoyed drawing the most and drew it on a larger paper. This was a separate grade.
Then I gave out 12x12 chipboard and the students had to draw their still life on the board, completely filling the board.

Here is my sample that I drew.

 Then, because we were using chipboard and it would warp, I had the students paint the backside a solid color.


And finally the fun part! Students had to paint their "canvas" in grey scale. This base makes students focus on composition errors and highlights and shadows. 


When the "dead" painting was the complete, the students was ready to add color. Students were given red, yellow, blue, black and white and were required to mix their own colors. The dark greys from the dead painting gave a great depth to the mixed colors.


This project has taken a lot longer than I originally planned, but was worth it. I can't wait to show off the finished artwork!

Thursday, February 27, 2014

Advanced Art Students tackle Oil Paints!

Today my AP girls started Oil painting with palette knives!
 
We are taking it slowly and just learning how to hold the knife and how to spread the paint.


Tomorrow we are going to learn different brush strokes!

In case you want to join in our fun, check out http://www.paletteknife.net/ 

Tuesday, December 10, 2013

Marilyn meet Super Kylie

In the busyness of life, I forget to post things to this blog! Really if you want to stay connected to my world, you need to follow my personal blog at www.faithhopeandart.blogspot.com

Anyway, here is my current printmaking project! I'm in love!

Wednesday, October 23, 2013

Getting ready for CLAY!!! Tested Tips for Teachers!

I've come to realize that some of the things that come naturally to me as an art teacher are not necessarily things that other art teachers are good at.  So, I'm going to start sharing a few tips. (Then I won't feel so bad when I steal art technique tips from other teachers!)

So today I'm going to share how I get ready to start clay for the first time in Art 1.

First, get out the OLDEST bags of clay first. I am using Low Fire White clay. I have 3 bags that I need to stretch out between 3 Art 1 classes. Two bags are pretty hard. One bag is nice and soft. I will force the students to use the two hard slabs first.  How you say.. easy. :)

Take the heavy block of clay out of the bag. (Yes I am working on the floor. It's easier for me to work on the floor and I've come to realize that it doesn't really matter if the clay is absolutely "clean" when I give it to students, it's not going to be "clean" when they are finished. It WILL have random bits of junk/hair/trash in it no matter what I say or do.)

Here is my block of clay. I do at least set it on it's plastic bag.

Now take your wire cutter and cut the block in half.

Lay 1/2 down and stand the other 1/2 on the clay base. Cut it in 1/2 as well.
 
Like this.

Now take the 1/4 wedge and cut it into 4 or so parts. Try to be somewhat consistent in size. But be ready to say.. "You get what you get and you don't throw a fit." Yes, even in high school!

Now take EACH wedge and place it into a plastic bag that zips closed. Brand doesn't matter. I use LOTS of ziploc bags. I make the quart size bags a supply item that kids have to provide. DON'T CLOSE THE BAG YET!!!
 
6. Now take the bags over to the sink and if the clay is already leather hard, place a few drops of water in each bag and close up the bag.

7. Place the OLDEST clay at the BOTTOM of the bucket. Place the BEST clay somewhere else until the old clay is used. (Notice the best clay is sitting on my counter inside gallon storage bags.. I'll pull these out at the end of the day for my last class. This is two-fold.. it forces the students to use the old clay first and it makes sure that every once in a while the last class of the day gets the best supply!)
 
Side note here... the students ALWAYS dig to the bottom of the bucket thinking that they are going to get the best of something...

Prepare your supplies for your table stations I use the lids  that come with small storage tubs for "plates" for my tables. I have one set on my front counter as an example of how I expect the students to place their supplies.

Notice the supplies on my front small table. I have EXACTLY the number of sharp instruments that we need for the tables. I only allow ONE of each tool per table. Students just have to share. I can keep up with seven of each of the tools, but I can't keep up with 25 of each!

You might also notice the canvas boards that I have in the tub next to the clay. These canvas boards are GREAT! They don't totally protect my tables, but they do a pretty good job. A lot of people cover the entire table for clay, but I don't have time as I teach Art 1, Art 2 and then back to Art 1. My advanced kids don't do clay at the same time as Art 1 and they really, really don't appreciate getting clay dust on their drawings!

So there you have it.

Art 1 is making 3 clay coils and a pinch pot today!

Friday, October 18, 2013

The Healing Tree


Three of my advanced art students have been volunteering their time and talent for the local hospital's wound care clinic by painting a "healing tree".

It's been a slower process than I thought it would be because they can only work from 4pm to 6pm during the week.

But the end result is going to be fantastic!

Here are a few pictures of the students at work.


They plan to complete it next week. 

I am proud of these girls and their work ethic! I met the doctor that works out of the clinic a couple of days ago and he asked me if I had been working on the mural with the girls. I said nope. And the nurses quickly said it's just been the girls, that I haven't picked up a paint brush. I told him that if I have done my job, I can tell the students the expectations, give them feedback and a little guidance and make sure that they have the necessary supplies, but I shouldn't have to do the project for them. He seemed a little surprised that I would be willing to give the students so much responsibility, I just said these are good kids and smiled. It was really interesting, he was so complimentary of the work, he just couldn't believe that I didn't force my hand in the work. I guess that the difference in our professions.